Cold-formed steel thermal bridging is a critical issue for builders in Canada’s climate. Thermal bridging occurs when heat finds a path through highly conductive materials (like metal) that bypasses insulation. In steel-framed walls, the metal studs readily conduct heat straight through the building envelope, undermining the insulation’s effectiveness. This means cold-formed steel (CFS) structures can lose heat much faster than wood-frame buildings if not detailed properly. The good news is there are builder-friendly solutions to solve thermal bridging in CFS framing and meet energy codes. In this blog, we’ll explain what thermal bridging is, why it impacts steel more than wood, how it affects energy performance and R-values (and compliance with codes like Canada’s NECB), and practical solutions to combat it.
What is Thermal Bridging in Steel Framing?
Thermal bridging is a heat leak through the building envelope. It happens when a material with high thermal conductivity spans from the warm side to the cold side of a wall or roof, allowing heat to flow through that “bridge”. In a typical wall, insulation slows heat transfer. But where you have a steel stud, for example, the metal is a much easier path for heat than the insulation. Heat will travel along the steel stud and escape to the outside (in winter), or enter from outside (in summer), bypassing the insulated cavity. This reduces the overall energy efficiency of the wall by creating cold spots and lowering the effective R-value. If unchecked, thermal bridges can lead to higher heating costs and even moisture issues (cold spots can cause condensation).
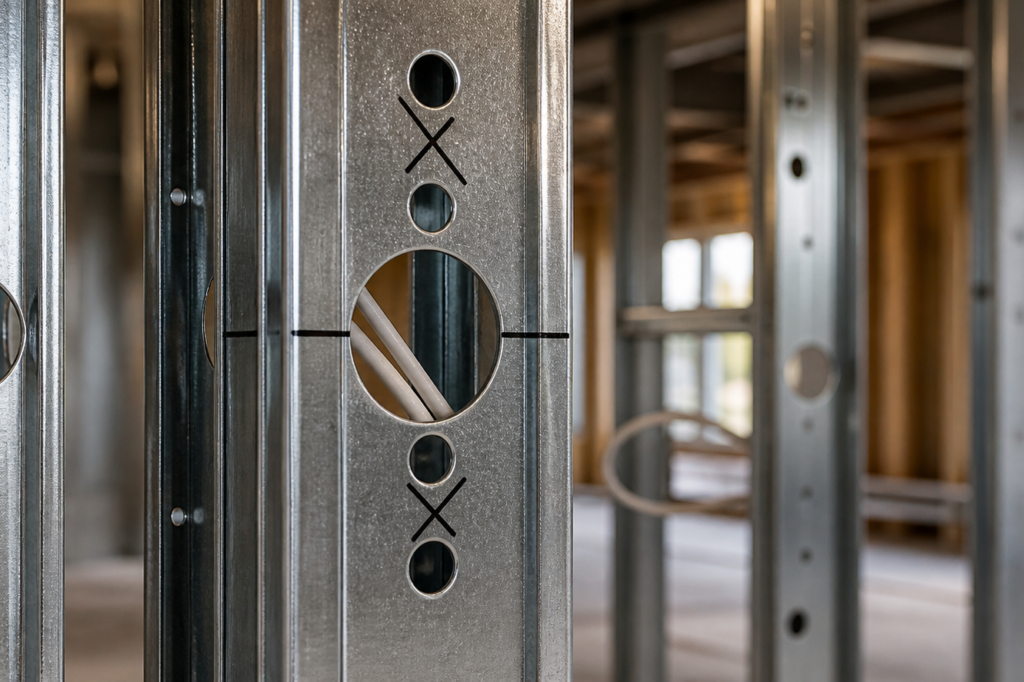
Why is cold-formed steel more vulnerable than wood? Steel is far more thermally conductive than wood – about 300 to 400 times more, by material properties. In practical terms, a steel stud will transmit heat dramatically faster than a wood stud of the same dimensions. The steel framing in walls, floors, or roofs becomes a network of thermal bridges wherever the metal connects interior to exterior. Wood, by contrast, is a natural insulator (it has roughly 1/300th the conductivity of steel), so wood studs do not siphon heat as readily. As a result, cold-formed steel framing needs extra attention to insulation details that wouldn’t be as critical with wood framing.
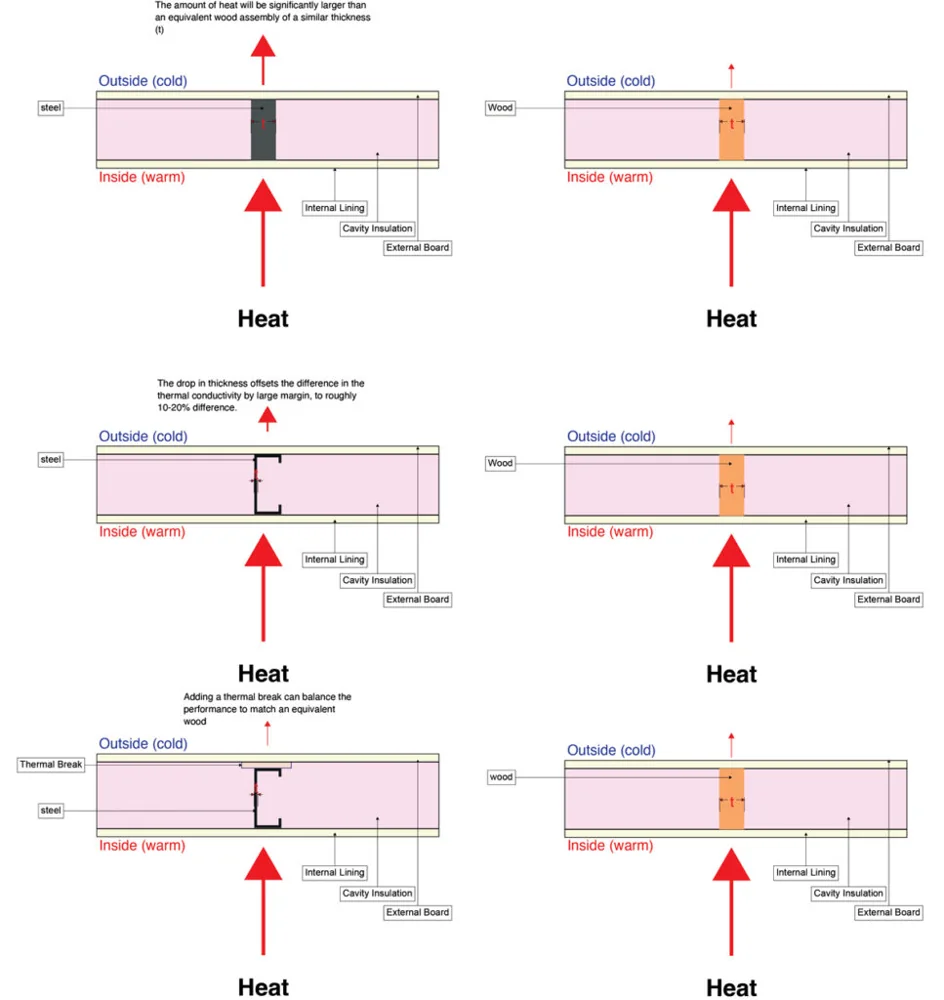
Because CFS studs are made of very thin steel, the difference in heat loss is not 400× worse in reality. The thin profile means less cross-sectional area for heat to flow, bringing the steel vs. wood heat loss difference down to roughly 20–30% in a typical wall. Even so, a steel-framed wall still loses substantially more heat than a wood-framed wall with the same insulation. For example, a fiberglass batt rated R-19 might perform close to R-19 in a wood stud wall, but the same batt in a steel stud wall may only deliver about R-9 or R-10 effective performance. In other words, thermal bridging through the steel can cut the insulation value nearly in half. This lost performance has big impacts on energy efficiency and code compliance.
Why Thermal Bridging Hurts Energy Performance and Code Compliance
When thermal bridging isn’t addressed, the consequences show up in both comfort and compliance. As noted, the effective R-value of insulated steel walls can be 50% lower than expected due to steel’s heat flow. That means higher heat loss in winter, higher cooling loads in summer, and higher energy bills year-round. Occupants may feel colder near walls or experience drafts because the steel studs create cold stripes in the wall. Moisture can also become an issue: the cold spots at steel locations can reach dew point and cause condensation inside wall cavities, risking mold or corrosion over time.
From a building code perspective, thermal bridging can make it challenging to meet the National Energy Code of Canada for Buildings (NECB) or provincial energy codes. These codes set minimum thermal performance (either by required R-values or maximum U-value for walls). For example, builders often need something like R-20 effective for above-grade walls in colder Canadian climates. If you only install cavity batts in a steel-framed wall, you might fall short of the code-required effective R-value because the steel’s thermal bridging drags it down. In many cases, energy codes effectively mandate additional measures like continuous insulation for steel-framed assemblies. One industry expert notes that in many climate zones a steel-framed wall might require, for instance, R-13 batt insulation plus about R-5 continuous insulation on the exterior just to meet baseline code – without that continuous insulation, “meeting these standards is nearly impossible”. Canadian codes (NECB and provincial codes) similarly demand high performance that you can only achieve by mitigating thermal bridges.
In short, if you ignore thermal bridging in cold-formed steel, your wall might fail to meet NECB effective R-value requirements, and even if it squeaks by, the building will use more energy and cost more to heat. Fortunately, building science provides clear solutions to thermal bridging. By incorporating a few key strategies into your steel framing projects, you can preserve insulation performance, comply with code, and ensure your buildings stay comfortable and efficient.
Solution 1: Continuous Exterior Insulation
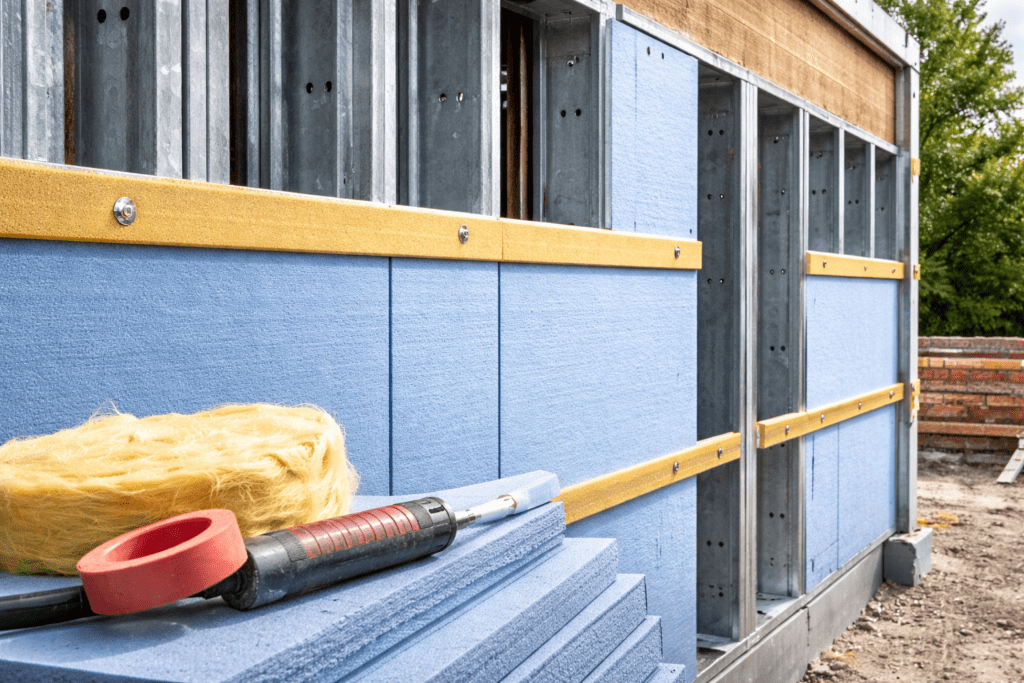
One of the most straightforward and effective solutions is adding continuous insulation (CI) outside the steel framing. This means wrapping a layer of rigid or semi-rigid insulation around the exterior of the studs, uninterrupted by thermal bridges. Exterior continuous insulation is widely recognized as the best way to reduce thermal bridging in CFS buildings. By covering the steel with a thermal blanket on the outside, you dramatically slow down heat transfer. The continuous insulation layer raises the average R-value of the wall assembly and prevents the steel studs from touching cold exterior materials directly.
Common materials for continuous exterior insulation include:
Rigid foam boards – such as expanded polystyrene (EPS), extruded polystyrene (XPS), graphite-infused EPS (GPS), or polyisocyanurate (polyiso). These foam boards have high R-value per inch and form a solid thermal barrier when installed with taped joints.
Mineral wool boards – rock wool or mineral fiber insulation boards are another option, often chosen for their non-combustibility and vapor permeability. They are semi-rigid panels that can be placed outside the sheathing to provide continuous R-value.
Spray-applied insulation – Closed-cell spray foam can be applied as a continuous layer (typically in retrofit situations or between furring), though rigid boards are more common for a uniform exterior layer.
To be effective, the continuous insulation should cover the entire exterior, with minimal gaps. Even a few inches of continuous insulation can make a big difference. For instance, adding 2 inches of rigid foam outside a steel stud wall can boost the effective R-value significantly and eliminate condensation spots on the interior. By wrapping the structure in a blanket of insulation, you create a consistent thermal barrier to heat flow. This approach is so successful that most modern steel-framed designs in cold climates incorporate it from the start.
Continuous insulation isn’t just about meeting code; it also improves comfort and reduces long-term energy costs for the building owner. It’s a win-win solution. Keep in mind that when you add exterior insulation, you’ll need to plan for details like longer fasteners or clips to attach cladding, window jamb extensions, and ensuring the insulation itself meets fire code and durability requirements (in Canada, exterior insulation on steel buildings often must be non-combustible or have appropriate fire ratings). Overall, however, continuous exterior insulation is the go-to remedy for thermal bridging – think of it as putting a cozy jacket on your steel-framed building.
Solution 2: Add Thermal Breaks to Steel Connections
While continuous insulation addresses the clear wall areas, you also need to tackle thermal bridging at connection points and attachments. This is where thermal breaks come into play. A thermal break means inserting a material with low conductivity between steel components to disrupt the heat flow. Instead of steel touching steel, you have an isolating layer in between.
Where to use thermal breaks? Key spots include:
Between steel framing and cladding attachments: For example, if you have steel clips or girts holding up exterior cladding, those can punch through the insulation layer and create bridges. Replacing them with thermally broken clips (made of fiberglass or specialized plastic) or adding a thermal isolation pad can reduce that heat transfer. The right design uses thermally broken attachment methods so that cladding supports don’t short-circuit the continuous insulation.
At steel-to-steel junctions that span inside to outside: e.g., balcony or canopy connections, or where a steel stud meets an exterior steel beam. Using a thermal break pad or thermal spacer (often a dense rigid insulation piece or a fiberglass block) at these junctions can interrupt heat flow.
Along steel stud faces or tracks: Some builders apply thermal break strips on the exterior face of steel studs or tracks. These could be thin strips of insulating material (like strips of foam or specialty thermal break tape) that reduce direct contact between the cold steel flange and the exterior sheathing or cladding. Even a thin (e.g. 1/4” or 1/2”) thermal break strip can improve performance slightly.
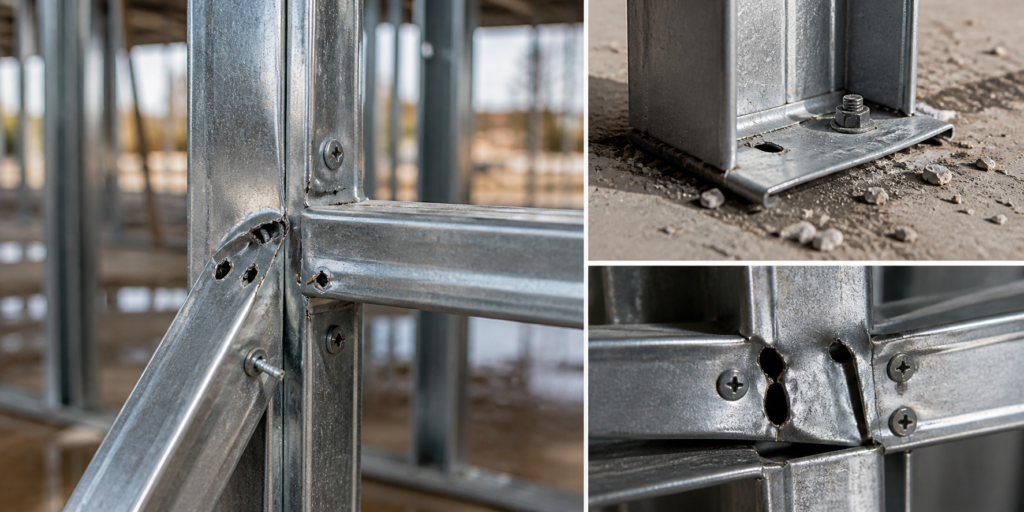
Modern building products have made this easier. There are engineered thermal break solutions available – for instance, fiberglass spacers, thermal break gaskets, or slotted steel studs. Slotted studs are CFS studs with perforations cut out of the web; these slots disrupt the heat conduction path through the steel, significantly lowering thermal bridging while still carrying structural load. Several manufacturers offer slotted or “thermally broken” steel stud profiles intended for exterior walls in cold climates. Similarly, thermal break clips (for attaching cladding over insulation) made of composite materials can support loads but conduct much less heat than a steel clip.
In practice, adding thermal breaks means introducing less conductive materials at every critical connection. Examples include using thermal break shims or pads under sill tracks, fiberglass Z-girts or brackets instead of steel ones to hold cladding, and plastic spacers for fasteners. By reducing the metal-to-metal contact, you cut down the heat flow at those points. Even small thermal breaks can help – for instance, a thin isolator between a steel ledger and a wall can prevent a major cold bridge.
Remember to verify that any thermal break material you use is acceptable for fire and structural requirements (especially in Canada’s code context). Many thermal break products are engineered to have a fire rating or to be non-combustible. Always follow product specs and code guidelines. When done right, thermal breaks at connections work hand-in-hand with continuous insulation to maintain a robust thermal envelope. The result is a steel-framed wall that performs almost like a wood wall in terms of heat loss – without sacrificing the strength and other benefits of steel.
Solution 3: Advanced Framing Techniques to Minimize Bridging
Another approach to solving cold-formed steel thermal bridging is to optimize the framing layout itself. By modifying how you design and place the steel members, you can reduce the pathways for heat to travel. These advanced framing techniques (borrowed from wood framing best practices) aim to reduce the amount of steel that goes from inside to outside, and increase the space for insulation. Here are a few strategies:
Wider Spacing and Fewer Studs: Where structurally feasible, use 24-inch on-center stud spacing instead of 16-inch. This lowers the number of steel studs in the wall, which cuts down on the overall thermal bridge area. Fewer studs = fewer thermal bridges. Also avoid doubling up studs except where needed. For instance, use single studs at openings when possible, and two-stud corners instead of three-stud corner assemblies. A two-stud corner (plus ladder blocking for drywall) allows more insulation in the corner and removes an extra steel member. All of this is sometimes called reducing the framing factor – the percentage of wall area that is framing vs insulation. A lower framing factor means higher overall R-value.
Staggered or Double Stud Walls: This method creates a thermal break within the wall by having separate rows of studs for interior and exterior surfaces. In a staggered stud wall, you might use a wider track (e.g. 2×6 track) but insert alternating steel studs for the interior and exterior faces. Each stud only touches one side of the wall, and the cavity insulation weaves between them. Because no stud goes continuously from inside drywall to exterior sheathing, the thermal bridge is broken. A similar concept is the double-stud wall, where you actually build two parallel CFS walls (e.g., two 2×4 steel walls spaced a few inches apart) and offset their studs so they don’t line up. The gap between can be filled with insulation. These approaches significantly lower conductive heat paths through the wall, essentially achieving what continuous insulation does but by insulation in the cavity instead of outside. Double stud configurations in steel are less common than in wood, but the principle is valid – you eliminate direct steel thermal pathways. The trade-off is more framing material and potentially more labor, so these are typically used in special cases (or borrowed for high-performance designs).
Thermal Isolation in Design: Think about other ways to reduce steel exposure. For example, align floor joists or roof rafters with wall studs so you don’t have steel members crossing each other and creating concentrated bridges. Use header hangers or clip angles that allow you to avoid extra studs at openings. Any place you can replace a steel-to-steel contact with wood or insulation, or eliminate an unnecessary member, will improve thermal performance. Some builders use hybrid systems like a wood nailer or thermal break material on the exterior side of steel studs to attach finishes, rather than attaching finishes directly to steel. The idea is to decouple the interior structure from the exterior skin thermally.
Advanced framing is essentially about smart design to reduce thermal bridging at the source. It may require some coordination with engineers to ensure the structural integrity remains, especially if you are removing or thinning out steel members. But many cold-formed steel suppliers and designers are now familiar with energy-efficient detailing. They can help plan steel framing layouts that minimize thermal bridges while still meeting structural demands. By implementing these strategies – whether it’s spacing out studs, staggering them, or using innovative products – you can dramatically boost the effective R-value of steel-framed assemblies. In fact, with a combination of advanced framing, continuous insulation, and thermal breaks, steel-framed buildings have been shown to meet or exceed energy efficiency targets just as well as wood structures.
Conclusion: Build Energy-Smart Steel Structures
Cold-formed steel framing doesn’t have to mean an inefficient building. By addressing thermal bridging through continuous exterior insulation, thermal break techniques, and thoughtful framing design, CFS buildings can achieve high energy performance and easily satisfy NECB code requirements. The payoff for builders and developers is huge: lower energy costs for your clients, better comfort and quality, and the peace of mind that your projects are code-compliant and future-proofed against tightening energy standards. As one steel framing expert put it, “a metal building can be every bit as comfortable and efficient as any other type of structure – you just have to respect the physics of steel and plan for thermal bridging”.
If you’re a Canadian builder or developer working with cold-formed steel, now is the time to implement these thermal solutions. Don’t let thermal bridging undermine your project’s performance. Our team at LSF Pro has extensive experience in designing steel framing layouts and recommending thermal upgrades for code compliance. We can help you choose the right combination of continuous insulation, thermal breaks, and framing techniques to meet the NECB and keep your buildings efficient. Contact LSF Pro today to discuss your project – let’s work together to build steel-framed structures that are energy-efficient, comfortable, and built to last. Your future occupants (and your bottom line) will thank you!